FLAKY SOURDOUGH CROISSANT BREAD
- Sam

- Apr 3
- 6 min read

If you need my Sourdough Starter recipe, this is a really straightforward look at making sourdough starter and Sourdough Bread.
I came across this recipe scrolling on TikTok from the creator Kirtyyy and knew I had to try. I believe this trend originated from Amy Bakes Bread, the literal Sourdough queen online. While I mostly followed her recipe I stuck to the method I learned from my regular sourdough bread and baked at the same temperatures I am accustomed to.
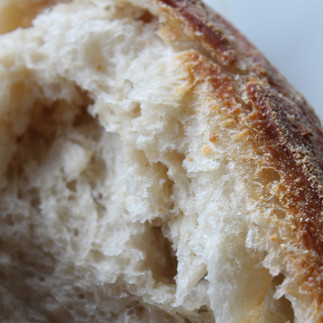
This flaky and buttery sourdough bread recipe is a new favorite. It's an easy way to achieve that croissant flavor without the intense process of laminating butter. I will definitely be using this recipe when I want to make a special breakfast bread that leans into the rich buttery flavors.
INGREDIENTS
125g Sourdough Starter
350g Warm Water
525g Bread Flour
9-12g Salt
½ stick Butter, unsalted
INSTRUCTIONS
MAKE THE DOUGH
Feed your starter, the day you want to make your dough and set aside until it doubles in size, about 4 hours, depending on the temperature of your kitchen.*
In a large bowl, whisk together 125g of active sourdough starter and 350g of warm water until combined.
Add 525g of bread flour and 9-12g of salt, mixing with a spatula or your hands until a rough dough forms. Cover with a damp towel and let rest for 30 minutes.
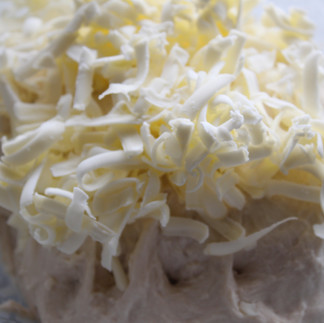
Shred your stick of butter and place in the fridge until ready for stretch and folds.
* If you're taking your starter out of the fridge, feed it the night before you want to make your dough to get it active again. If you’re in a hurry, you can take it out, feed it, and wait until it becomes bubbly and doubles in size (which can take anywhere from 3-6 hours, depending on temperature and starter strength) before using it in your dough. If your starter is sluggish, it might need that overnight feed to be at its best!
STRETCH AND FOLD (ADD THE BUTTER)
After resting, perform a series of stretch and folds by grabbing one edge of the dough, pulling it up, and folding it over the center.
Rotate the bowl and repeat 3 more times (going around each "corner" of the bowl). Cover and let rest for 30 minutes.
After 30 minutes has passed, repeat this process. During the second set of stretch and folds, add half the shredded butter in. Place the butter back in the fridge.
Repeat this process after 30 minutes. During the third set of stretch and folds add the remaining butter.
Perform the final set of stretch and folds.
FIRST PROOF (BULK FERMENTATION)
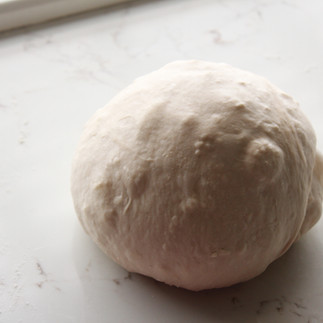
Cover the bowl and let the dough rise at room temperature for 6-10 hours, or until it increases by 50% in volume and looks light and bubbly. Warmer environments may require less time, so keep an eye on visual cues rather than the clock.
If you cannot let it sit at room temperature for the full time, you can place in the fridge overnight and let the rest of the bulk take place the next morning.
SECOND PROOF (SHAPE THE DOUGH)
Lightly flour your work surface and gently turn out the dough.
Fold the top edge of the dough down toward the center, then fold the sides in.
Roll the dough down toward the bottom to create surface tension, shaping it into a round or oval.
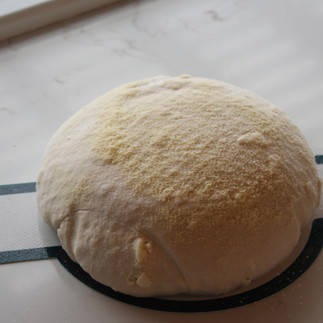
Using a proofing basket, dust it with rice flour or semolina flour and place the dough seam-side up inside.
Let rest in the fridge for 12-48 hours.
If short on time, skip shaping entirely. Simply transfer the dough to a container, cover, and place it in the fridge for 12-48 hours. A longer cold proof enhances flavor!
BAKE
Preheat your oven to 500°F with a Dutch oven inside. Cut a piece of parchment paper to fit.
Remove the dough from the fridge and gently turn it out onto the parchment. Score the top with a sharp blade or knife.
Transfer the dough (on the parchment) into the preheated Dutch oven. Lower the heat to 450°F, cover and bake for 30 minutes.
Uncover, lower the heat to 400°F, and bake for another 10-15 minutes until golden brown.
Let cool on a wire rack.
Note: Butter will leak out of the dough as it bakes at these high temperatures. It gives a buttery, crispy crust that is delicious – make sure you use parchment paper on the bottom of the pot so it doesn't make a mess everywhere. I did a layer of parchment and then the silicone bread sling. The butter will harden after it cools.
I will say to make slicing the bread easier I highly recommend a bread knife like this one. I hope you found this recipe helpful!!

If you plan on saving this recipe for later via Pinterest, feel free to use this image!
Please tag me if you end up making this recipe, I would LOVE to see how it turns out!!


Comments